Changing a ceiling light fixture is one of the easiest and most effective ways to change the look of your home. Replacing a ceiling light can significantly improve the quality of the lighting and also the style of the interior whether you are changing a damaged fixture, upgrading an old flush mount, or putting in a modern chandelier.
At Doozie Light Studio we believe that lighting is one of the most important aspects of a beautiful and functional space. In this guide, we will show you how to replace a ceiling light fixture safely and give it a clean, professional-looking installation.
Why Replace a Ceiling Light Fixture?
Modern lighting fixtures do much more than provide illumination. They help define the atmosphere, style, and architectural character of a room.
Replacing an old ceiling fixture can help:
- Improve room brightness
- Modernize interior décor
- Increase energy efficiency
- Add a luxury or contemporary feel
- Enhance dining rooms, bedrooms, kitchens, and entryways
From elegant chandeliers to minimalist flush mounts, updated lighting instantly transforms a space with warmth and sophistication.
Tools You Will Need
Before starting the installation, gather these basic tools:
- Screwdriver
- Voltage tester
- Wire strippers
- Wire connectors (wire nuts)
- Electrical tape
- Ladder or step stool
- Drill (optional)
- New ceiling light fixture
Having everything prepared before beginning will make the installation process smoother and safer.
1
Turn Off the Power
Safety should always be your first priority when working with electrical fixtures.
Go to your home’s electrical panel and switch off the breaker connected to the room where you are working. Never rely only on the wall switch.
Use a voltage tester to confirm there is no electrical current flowing to the fixture before touching any wires.
Important Safety Tip
Never attempt to replace a ceiling light fixture while the power is active.
2
Remove the Existing Light Fixture
Carefully remove the old fixture from the ceiling.
Most ceiling lights are attached using:
- Decorative screws
- Mounting brackets
- Canopy plates
Support the fixture with one hand while unscrewing it to prevent sudden falls.
Once detached, gently lower the fixture to expose the wiring connections behind it.
You will usually see:
- Black wire (hot/live)
- White wire (neutral)
- Green or copper wire (ground)
Before disconnecting anything, it is helpful to take a photo of the existing wire setup for reference.
3
Disconnect the Wiring
Unscrew the wire connectors and separate the wires carefully.
After disconnecting the wires:
- Remove the old mounting bracket if necessary
- Inspect the electrical box for damage or loose connections
- Ensure the ceiling box can support the weight of your new fixture
This is especially important for heavier chandeliers and pendant lights.
4
Install the New Mounting Bracket
Most modern ceiling fixtures include a new mounting bracket designed specifically for that fixture.
Attach the bracket securely to the ceiling electrical box using the provided screws.
Make sure the bracket is:
- Tight and stable
- Properly centered
- Level for straight fixture installation
A secure bracket is essential for both safety and visual balance.
5
Connect the Wires
Match the wires from the new fixture to the corresponding wires in the ceiling.
Standard wiring connections include:
- Black to black
- White to white
- Ground to ground
Secure the wires using wire connectors and gently tuck them into the electrical box.
If your fixture includes integrated LED components or additional wiring instructions, follow the manufacturer’s guidelines carefully.
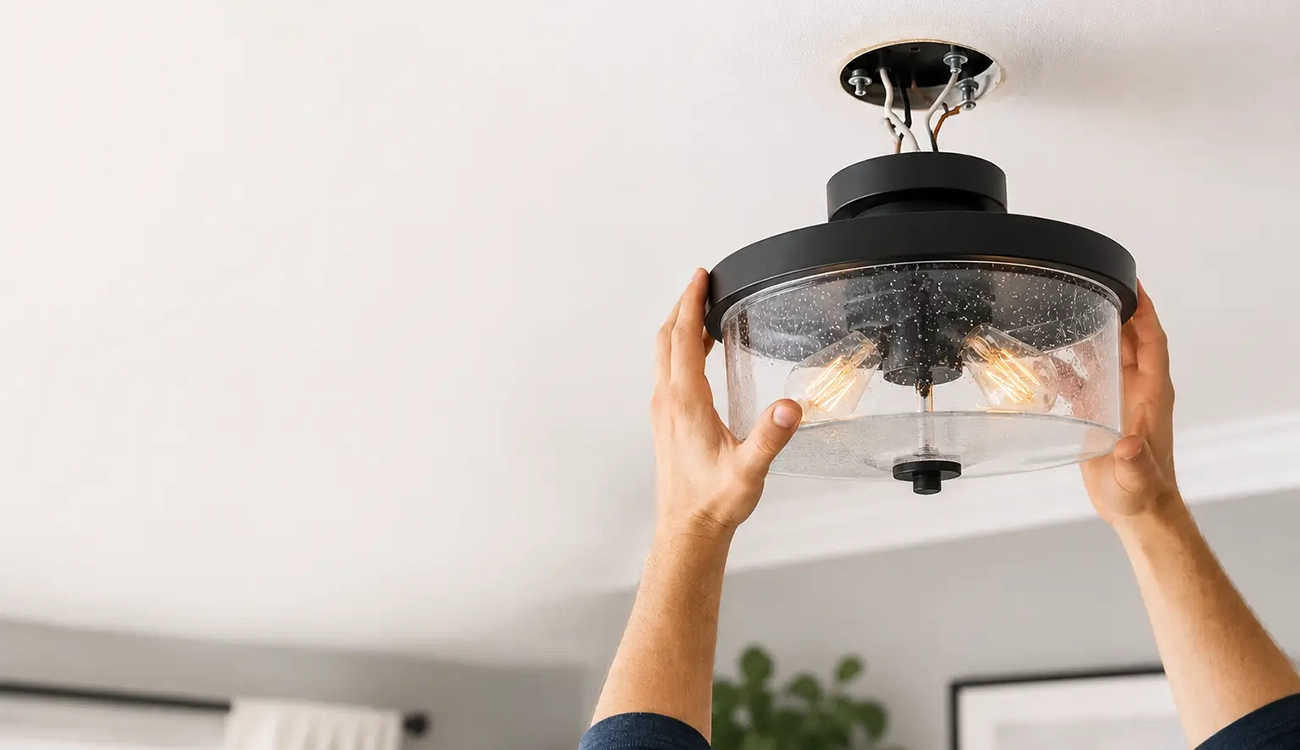
6
Attach the New Fixture
Lift the fixture into place and secure it to the mounting bracket.
Depending on the design, this may involve:
- Tightening decorative screws
- Installing a canopy plate
- Adjusting rods or hanging chains
Ensure the fixture sits flush against the ceiling and appears level from all angles.
For chandeliers and pendant lights, adjust the hanging height before fully tightening the hardware.
7
Install Bulbs and Decorative Components
Install the recommended bulbs and attach any glass shades, covers, or decorative accents included with the fixture.
Modern fixtures often feature:
- Frosted glass
- Globe shades
- Sculptural metal details
- LED-integrated lighting
Choosing warm white bulbs can help create a softer and more inviting atmosphere.
8
Restore Power and Test the Fixture
Turn the breaker back on and test the new light fixture.
Check for:
- Proper illumination
- Stable mounting
- Secure wiring
- Balanced appearance
If the fixture does not work, switch off the power again and inspect your wiring connections.
Tips for Choosing the Right Ceiling Light Fixture
When selecting a new fixture, consider:
- Room size and ceiling height
- Lighting brightness
- Fixture scale and proportion
- Interior design style
- Energy-efficient LED compatibility
Large rooms may benefit from statement chandeliers, while compact spaces often work best with flush mount or semi-flush fixtures.
Final Thoughts
Changing a ceiling light fixture is a simple upgrade that can dramatically improve the appearance and atmosphere of your home. With proper safety precautions and careful installation, replacing an outdated fixture can create a more stylish, functional, and welcoming space.
Whether you are searching for modern chandeliers, elegant flush mounts, or contemporary pendant lighting, explore refined lighting collections at Doozie Light Studio to discover timeless fixtures designed to elevate every interior.
Leave a comment